
Create a booking
Book a trip for a customer: who travels, when, from where to where, and which car. One save makes the booking and its duty slip.
- 1
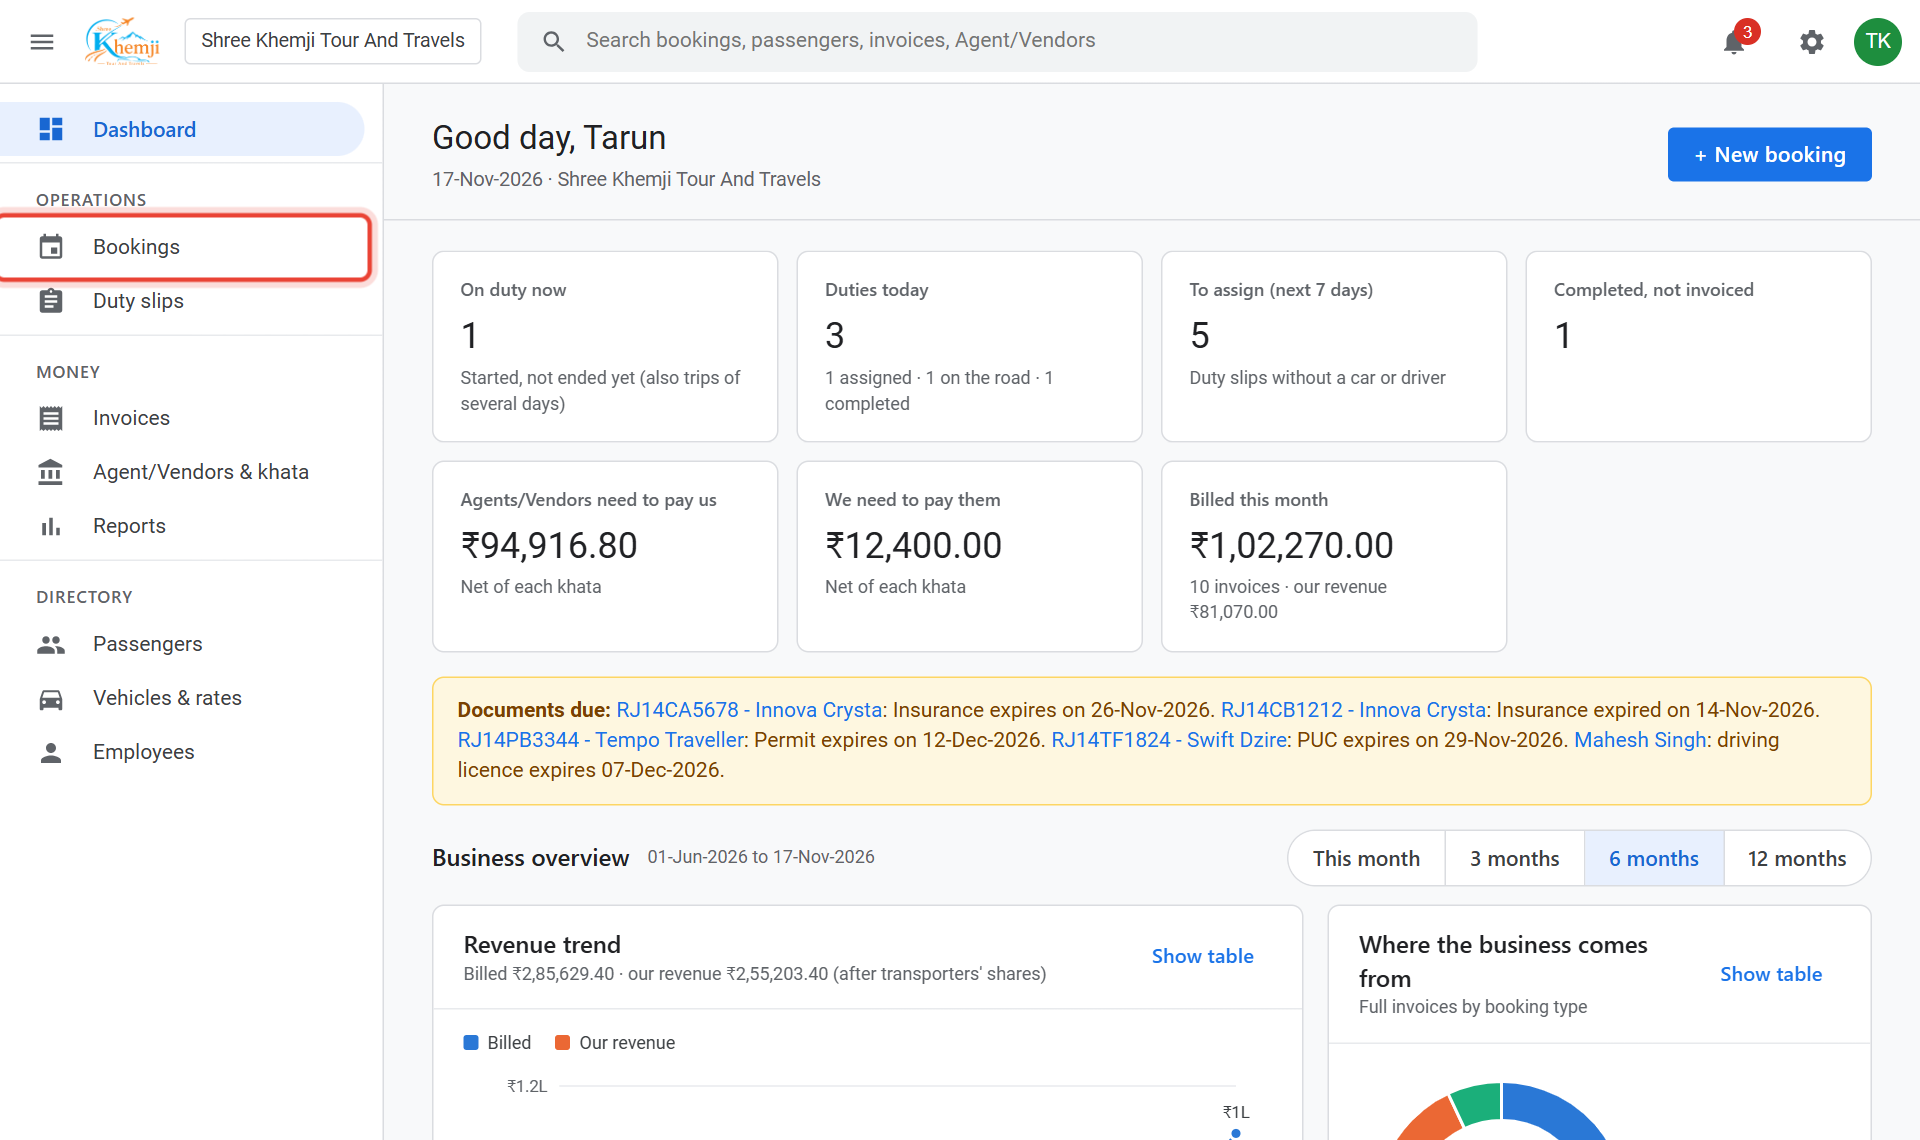
On the left menu, click Bookings.
- 2
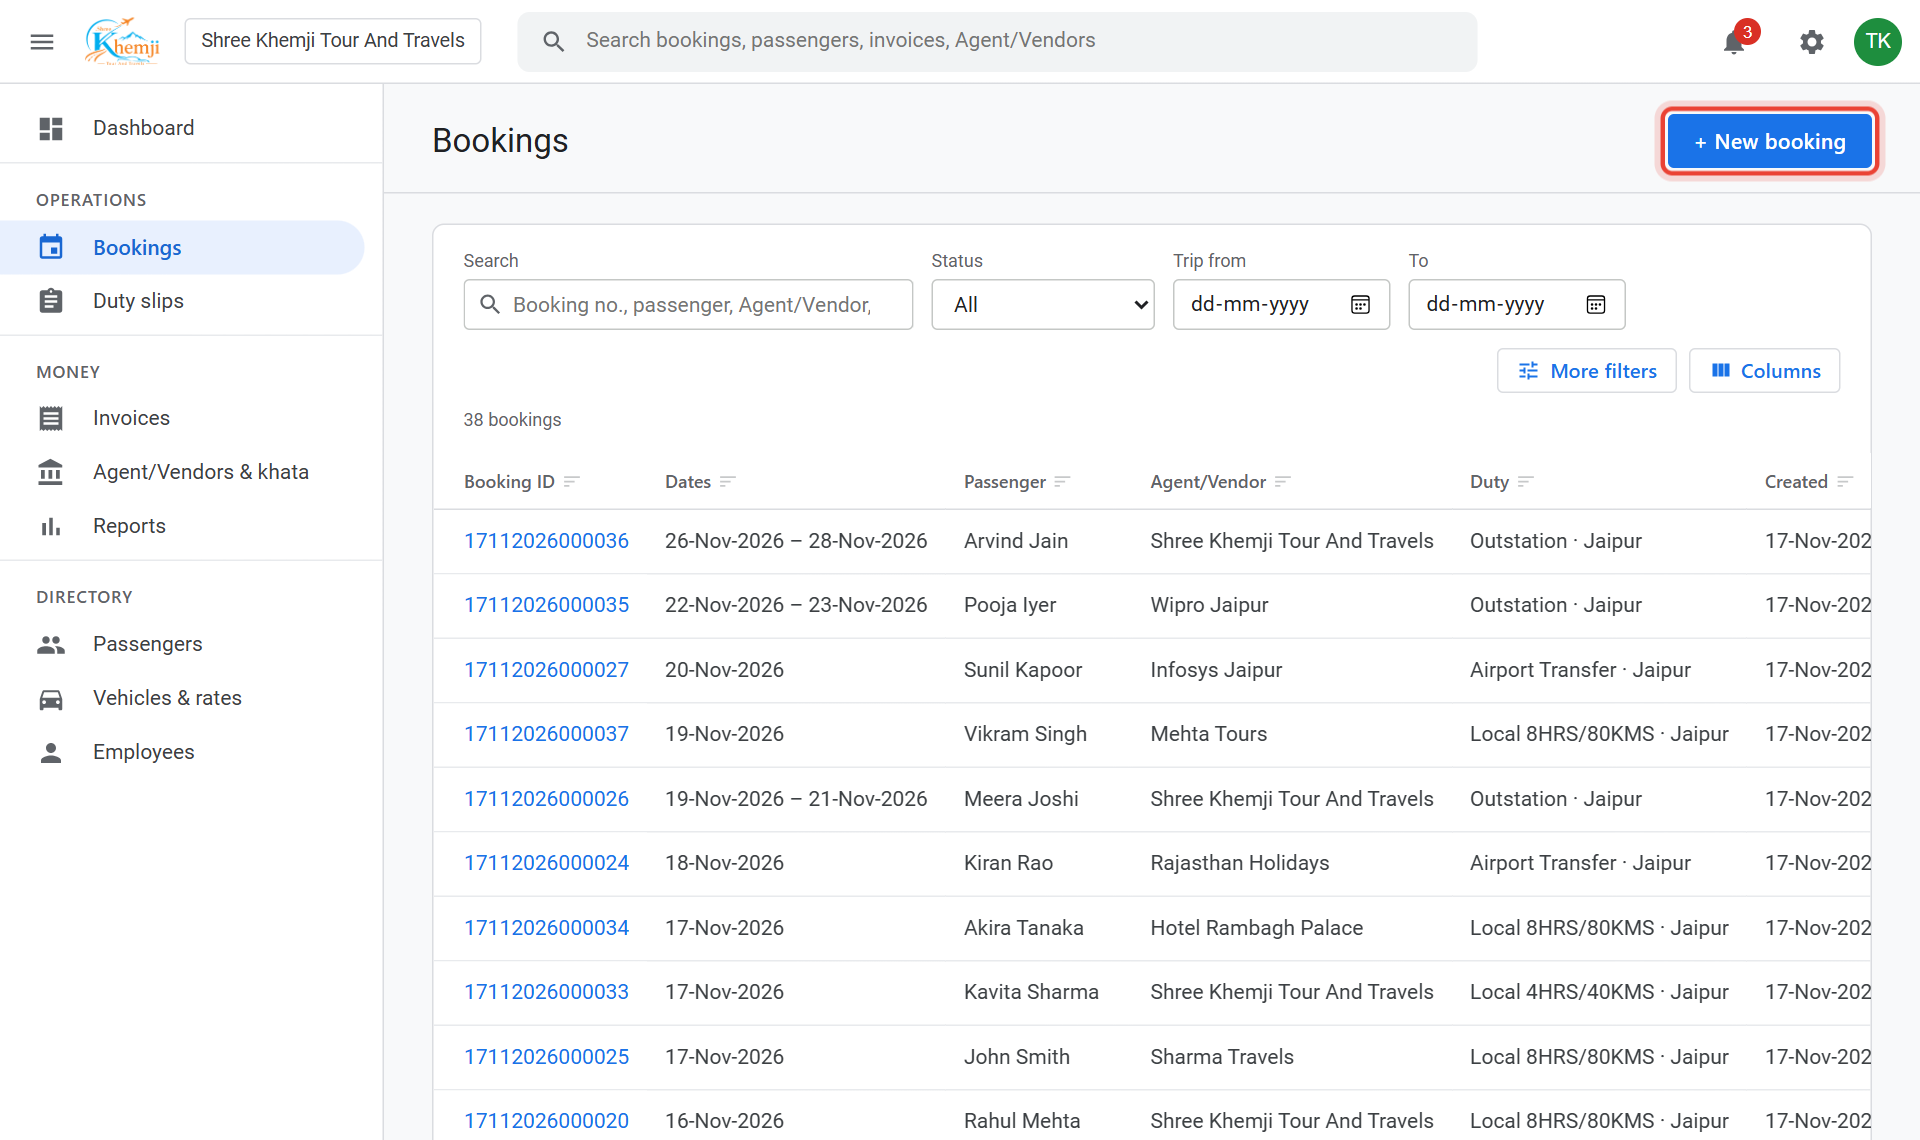
Click + New booking.
- 3
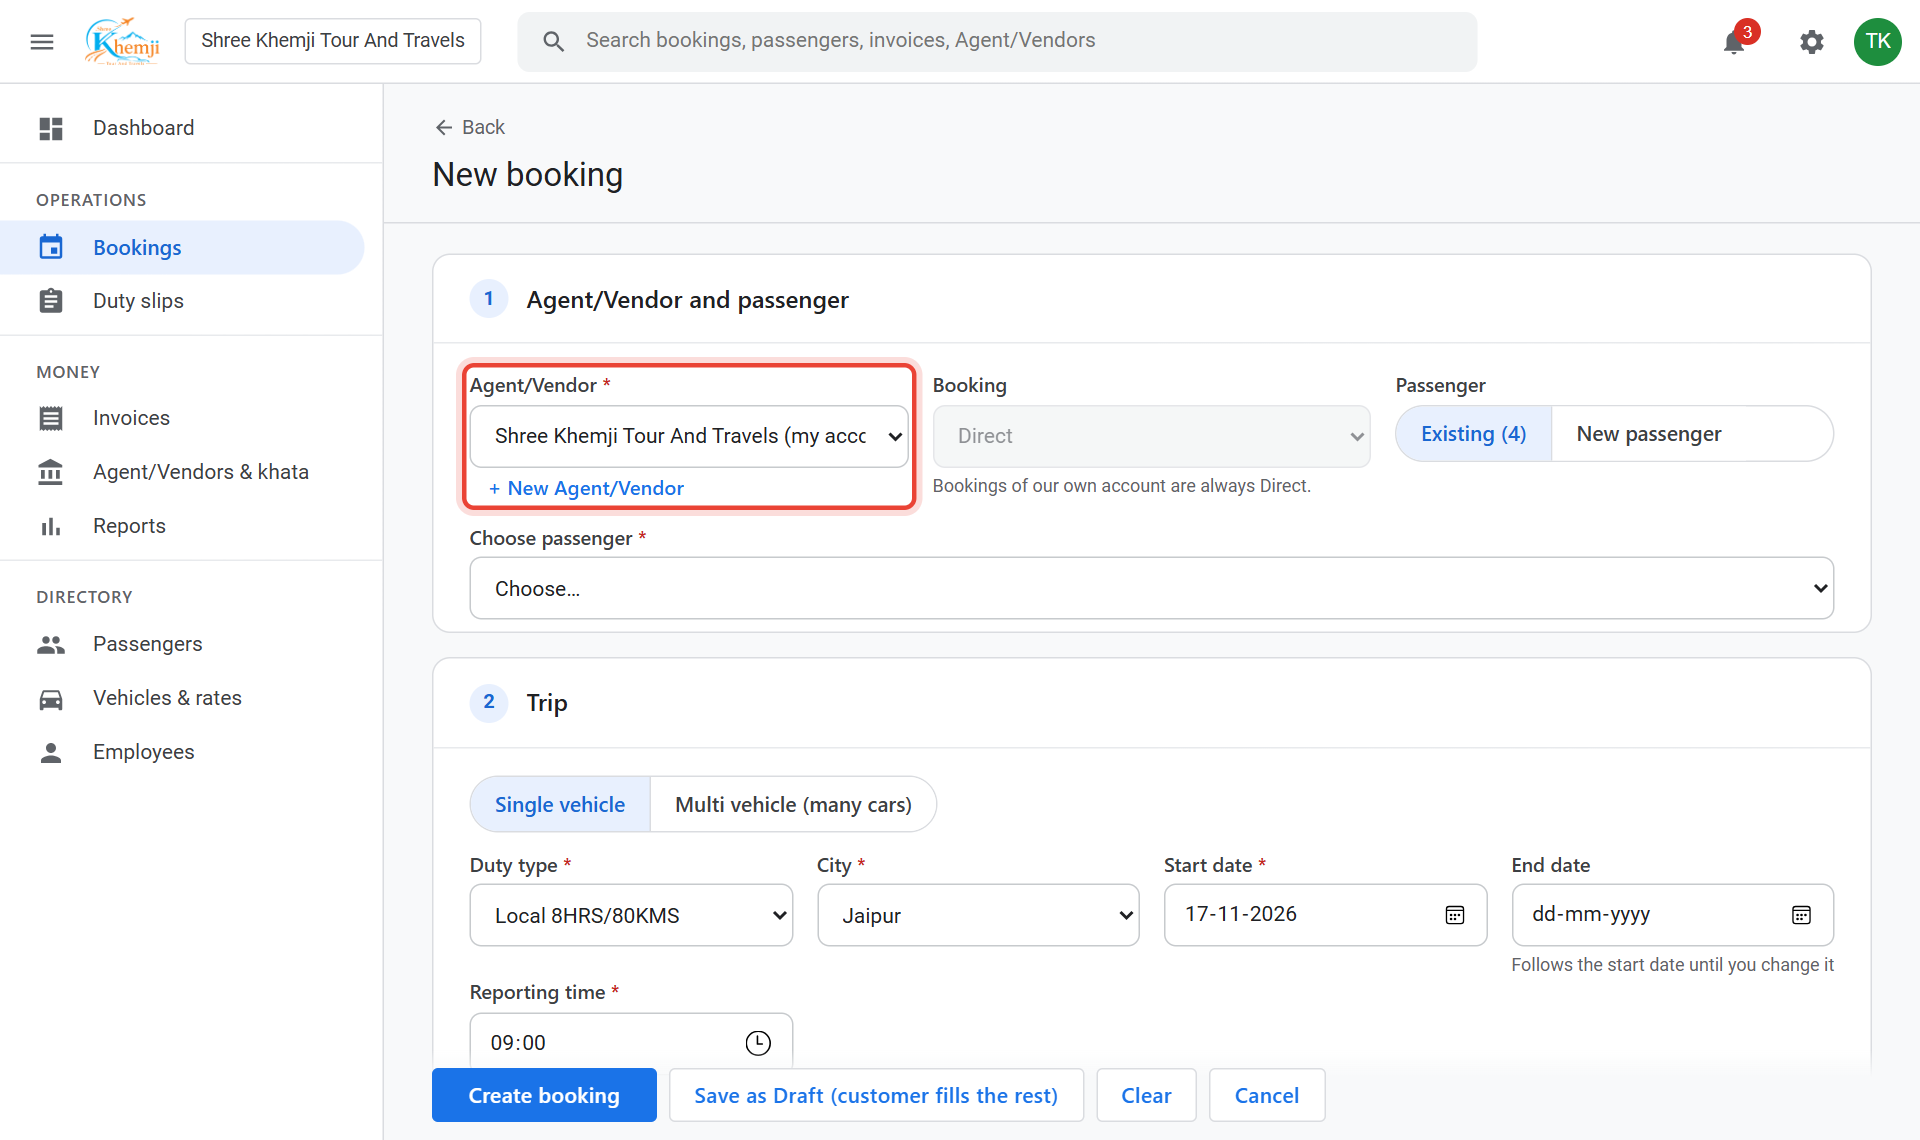
In Agent/Vendor, choose who the booking is for. For your own customer, choose your company (it says my account). For an agent's trip, choose the agent.
- 4
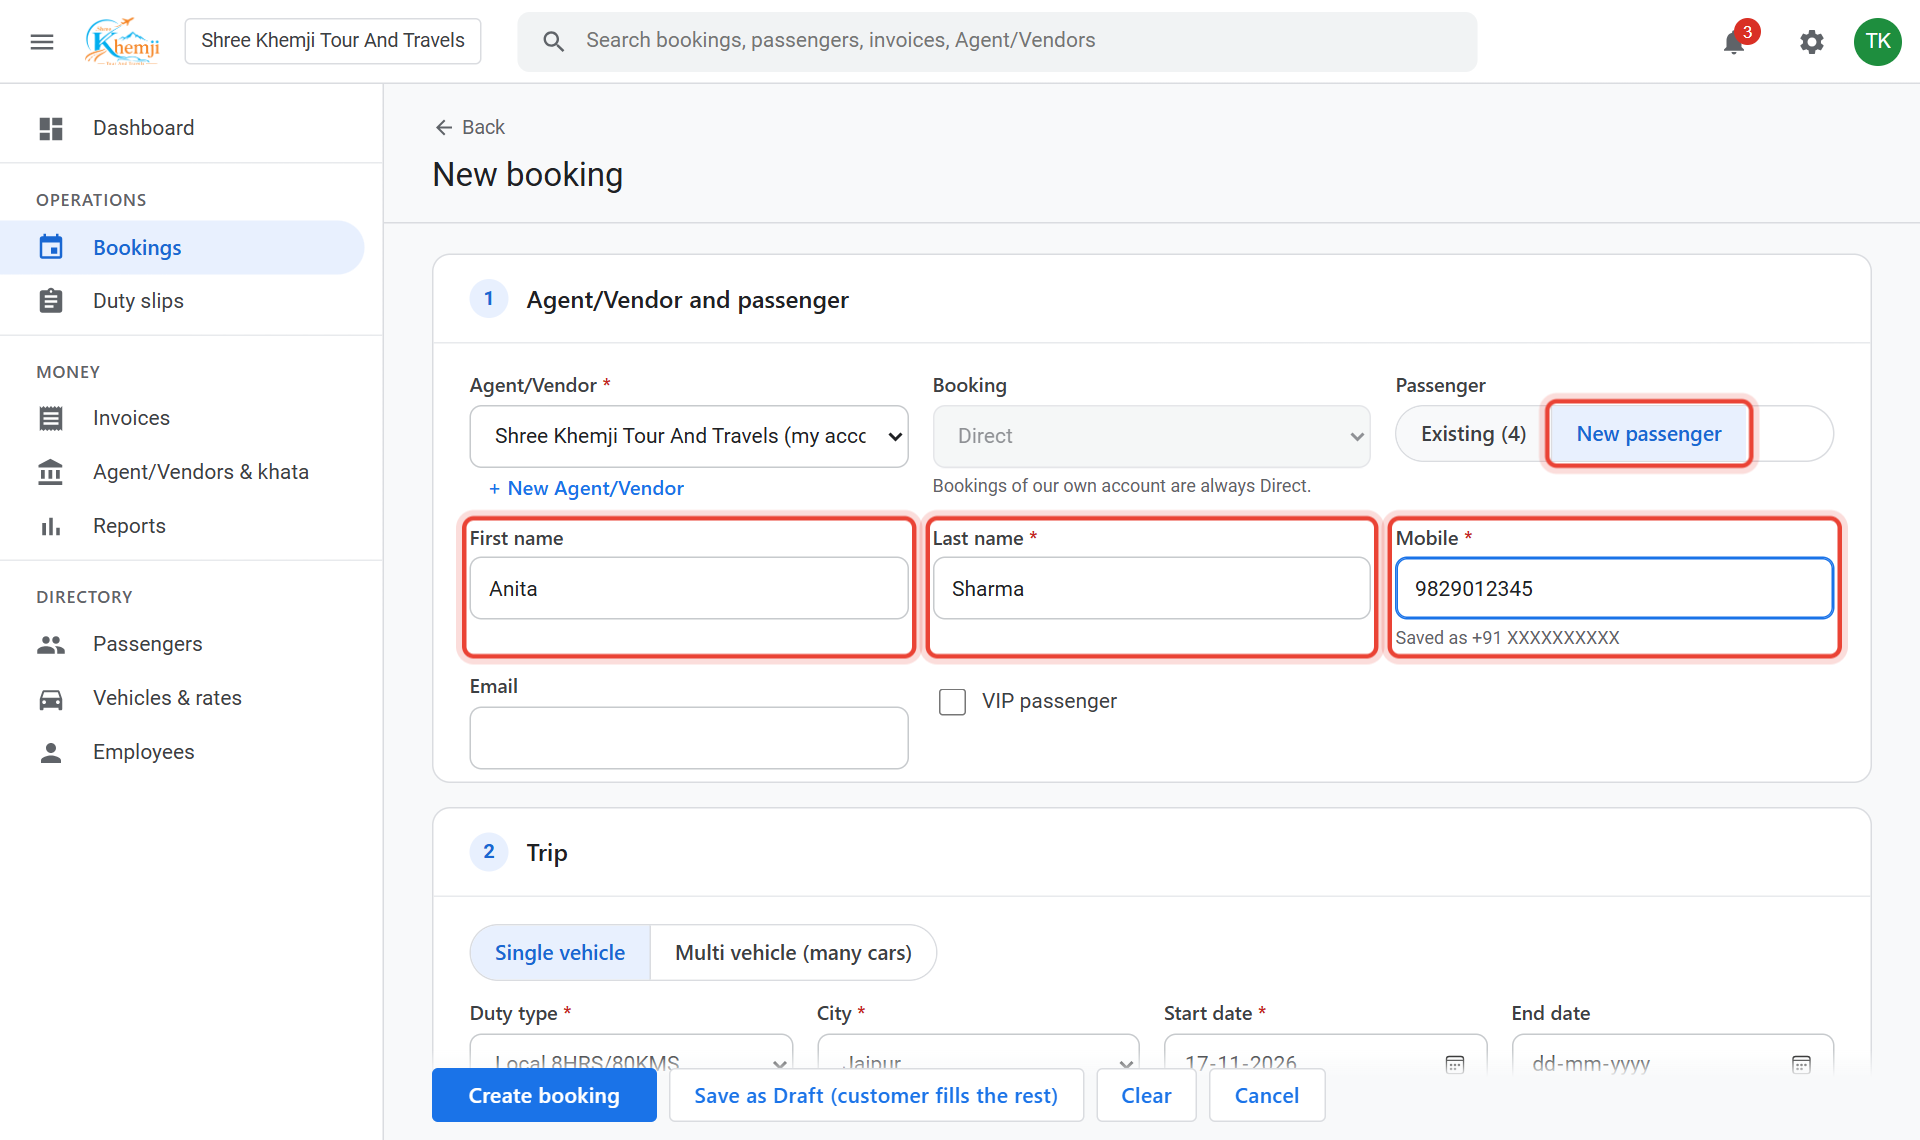
Click New passenger, then type the First name, Last name and Mobile (10 digits). A passenger you had before? Click Existing and pick them instead.
- 5
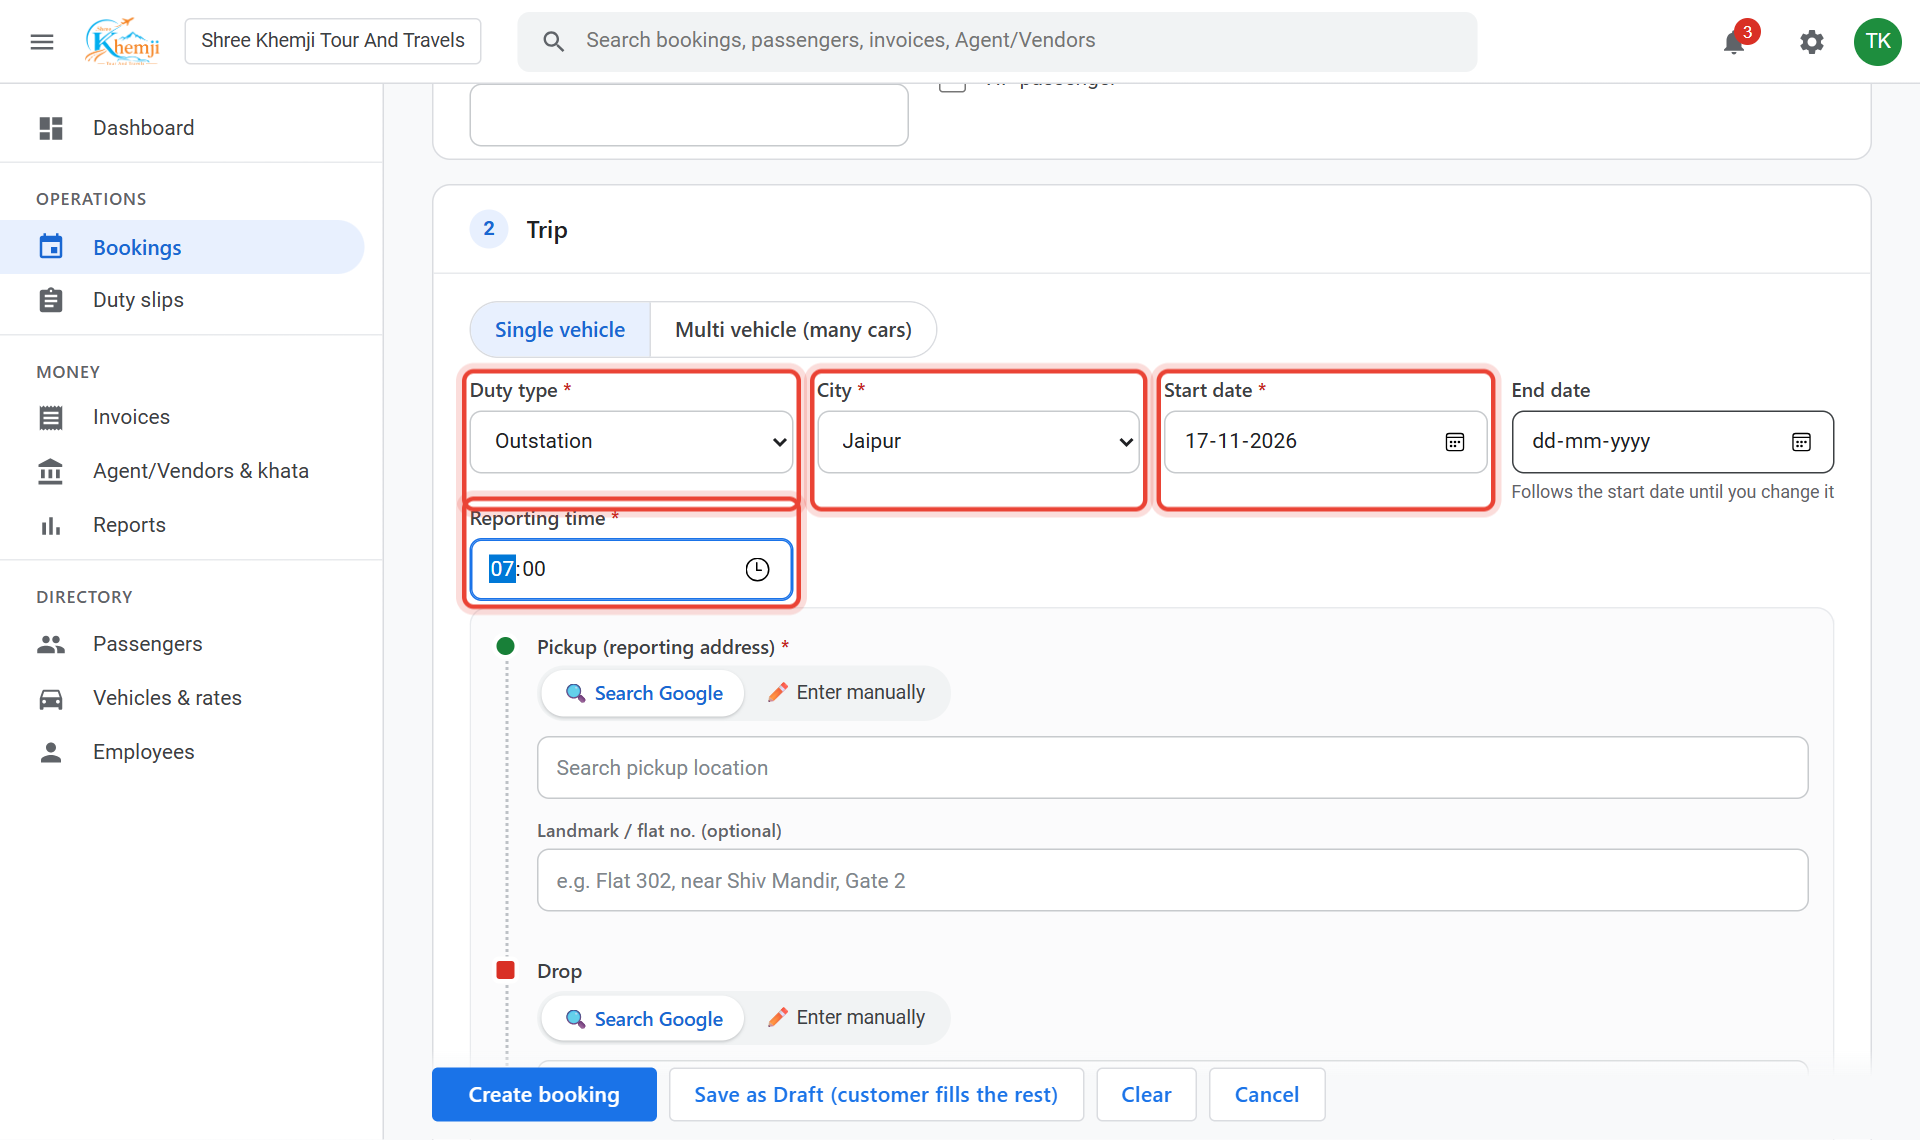
Under 2 · Trip, choose the Duty type (Local, Outstation, Airport…) and the City. Set the Start date, the End date for a trip of several days, and the Reporting time.
- 6
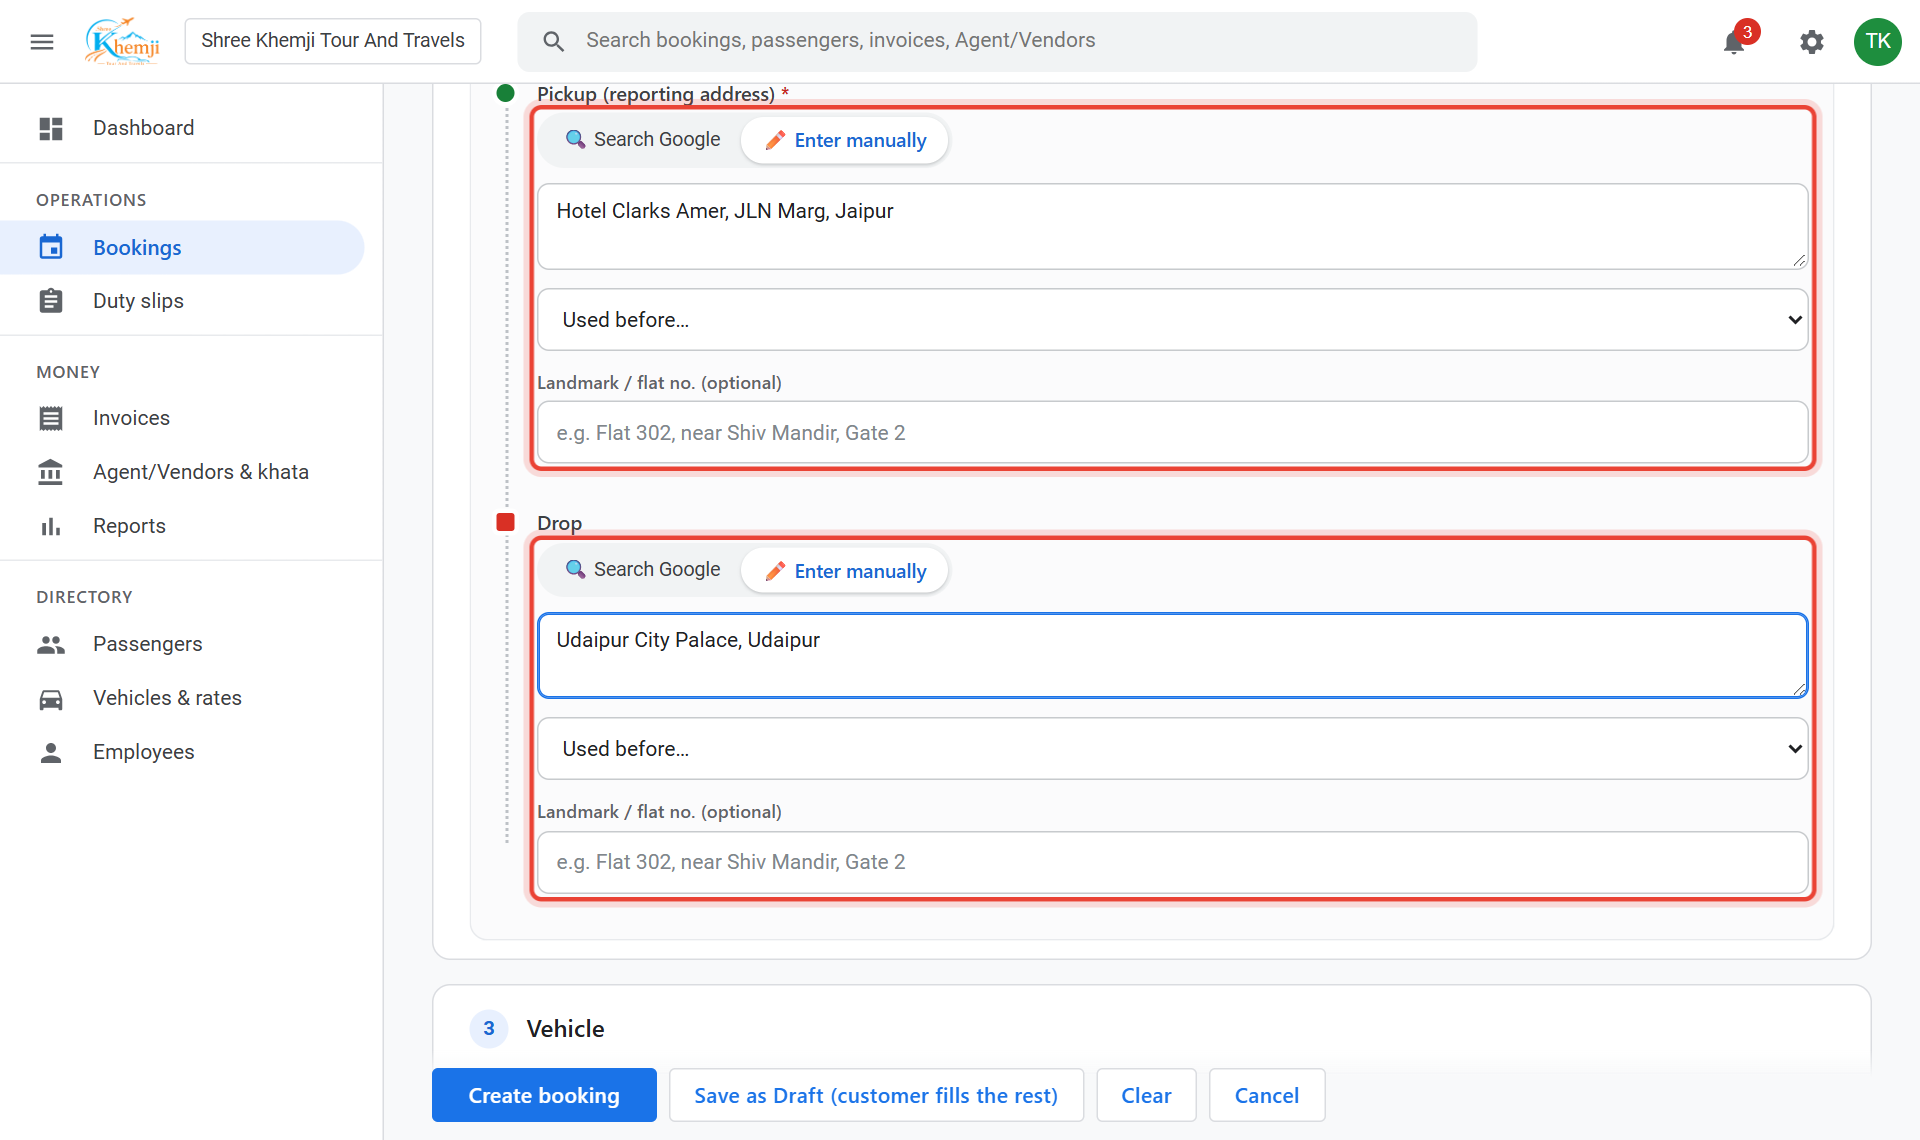
Type the Pickup and Drop address. Search Google finds a place on the map; Enter manually lets you type it.
- 7
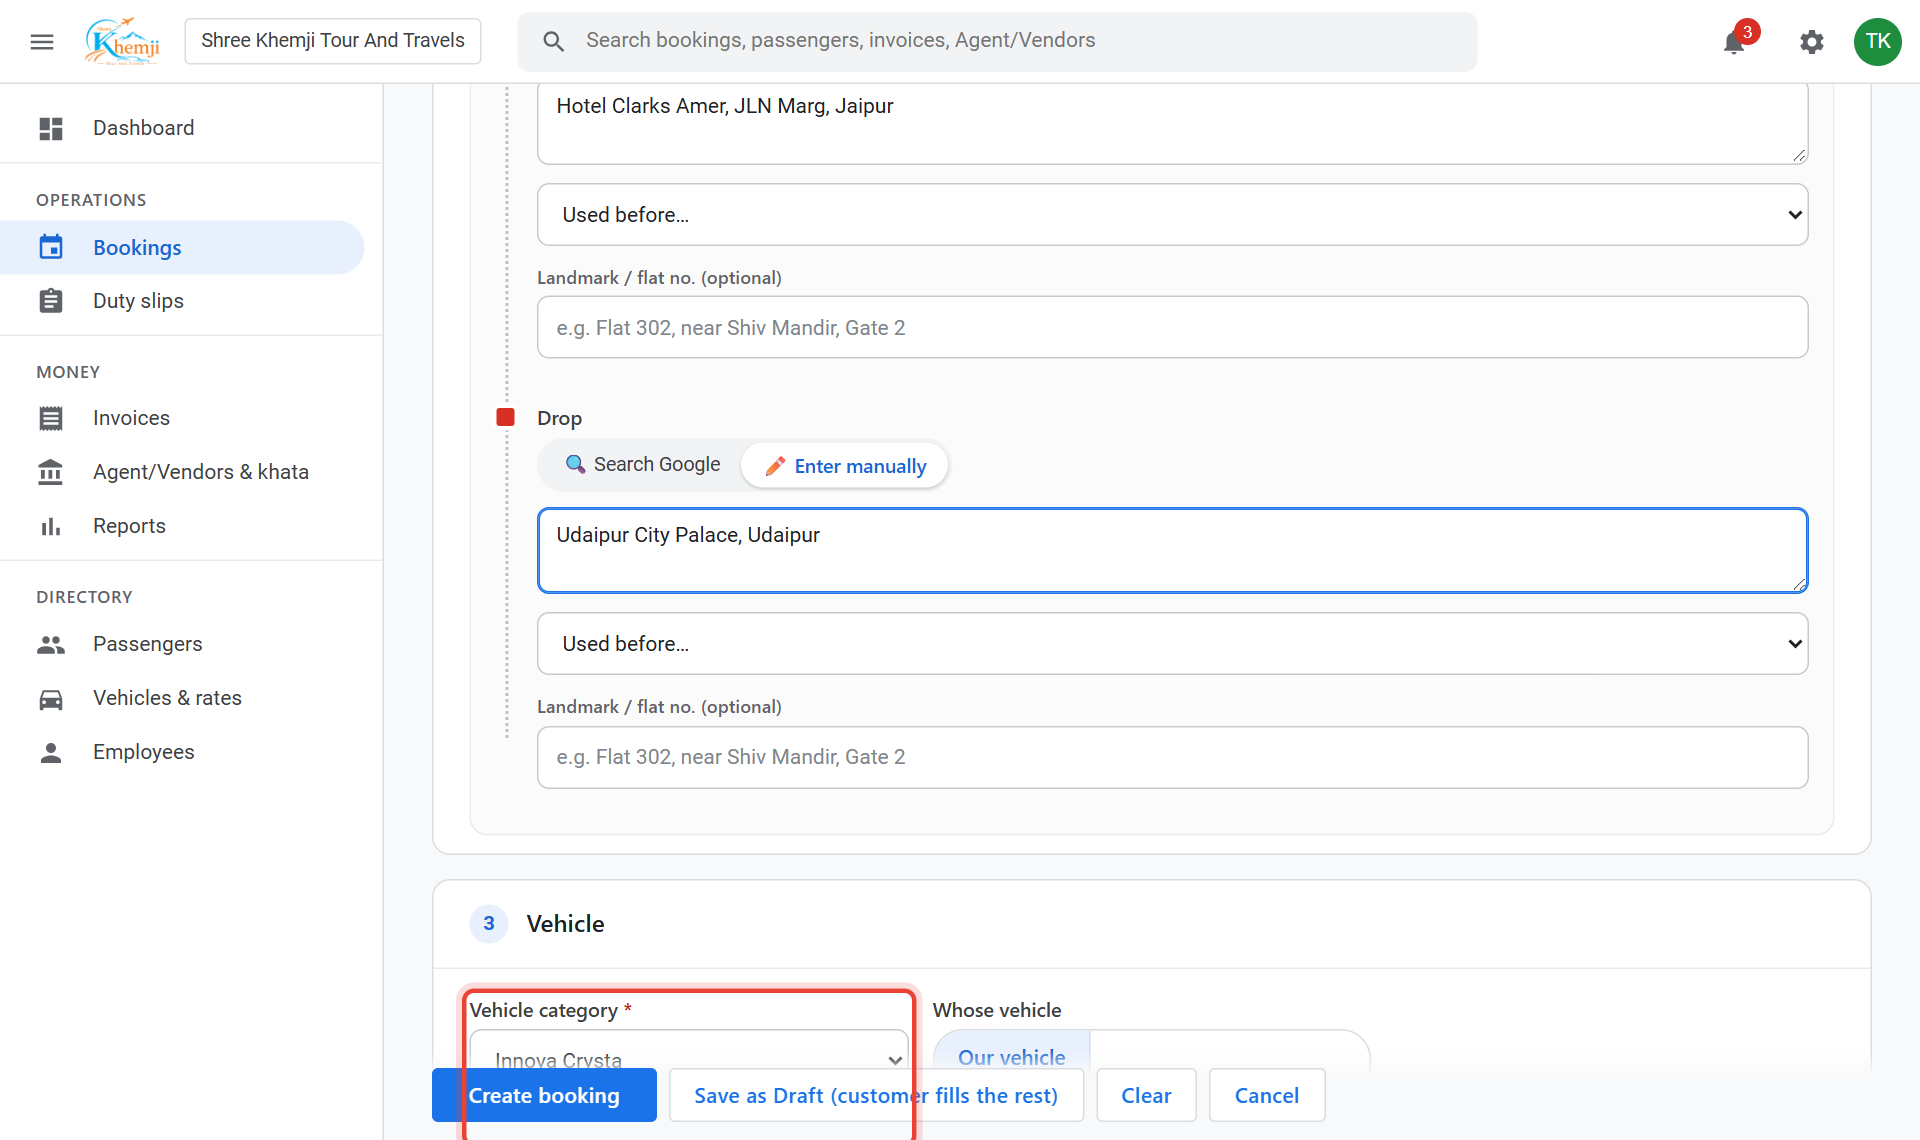
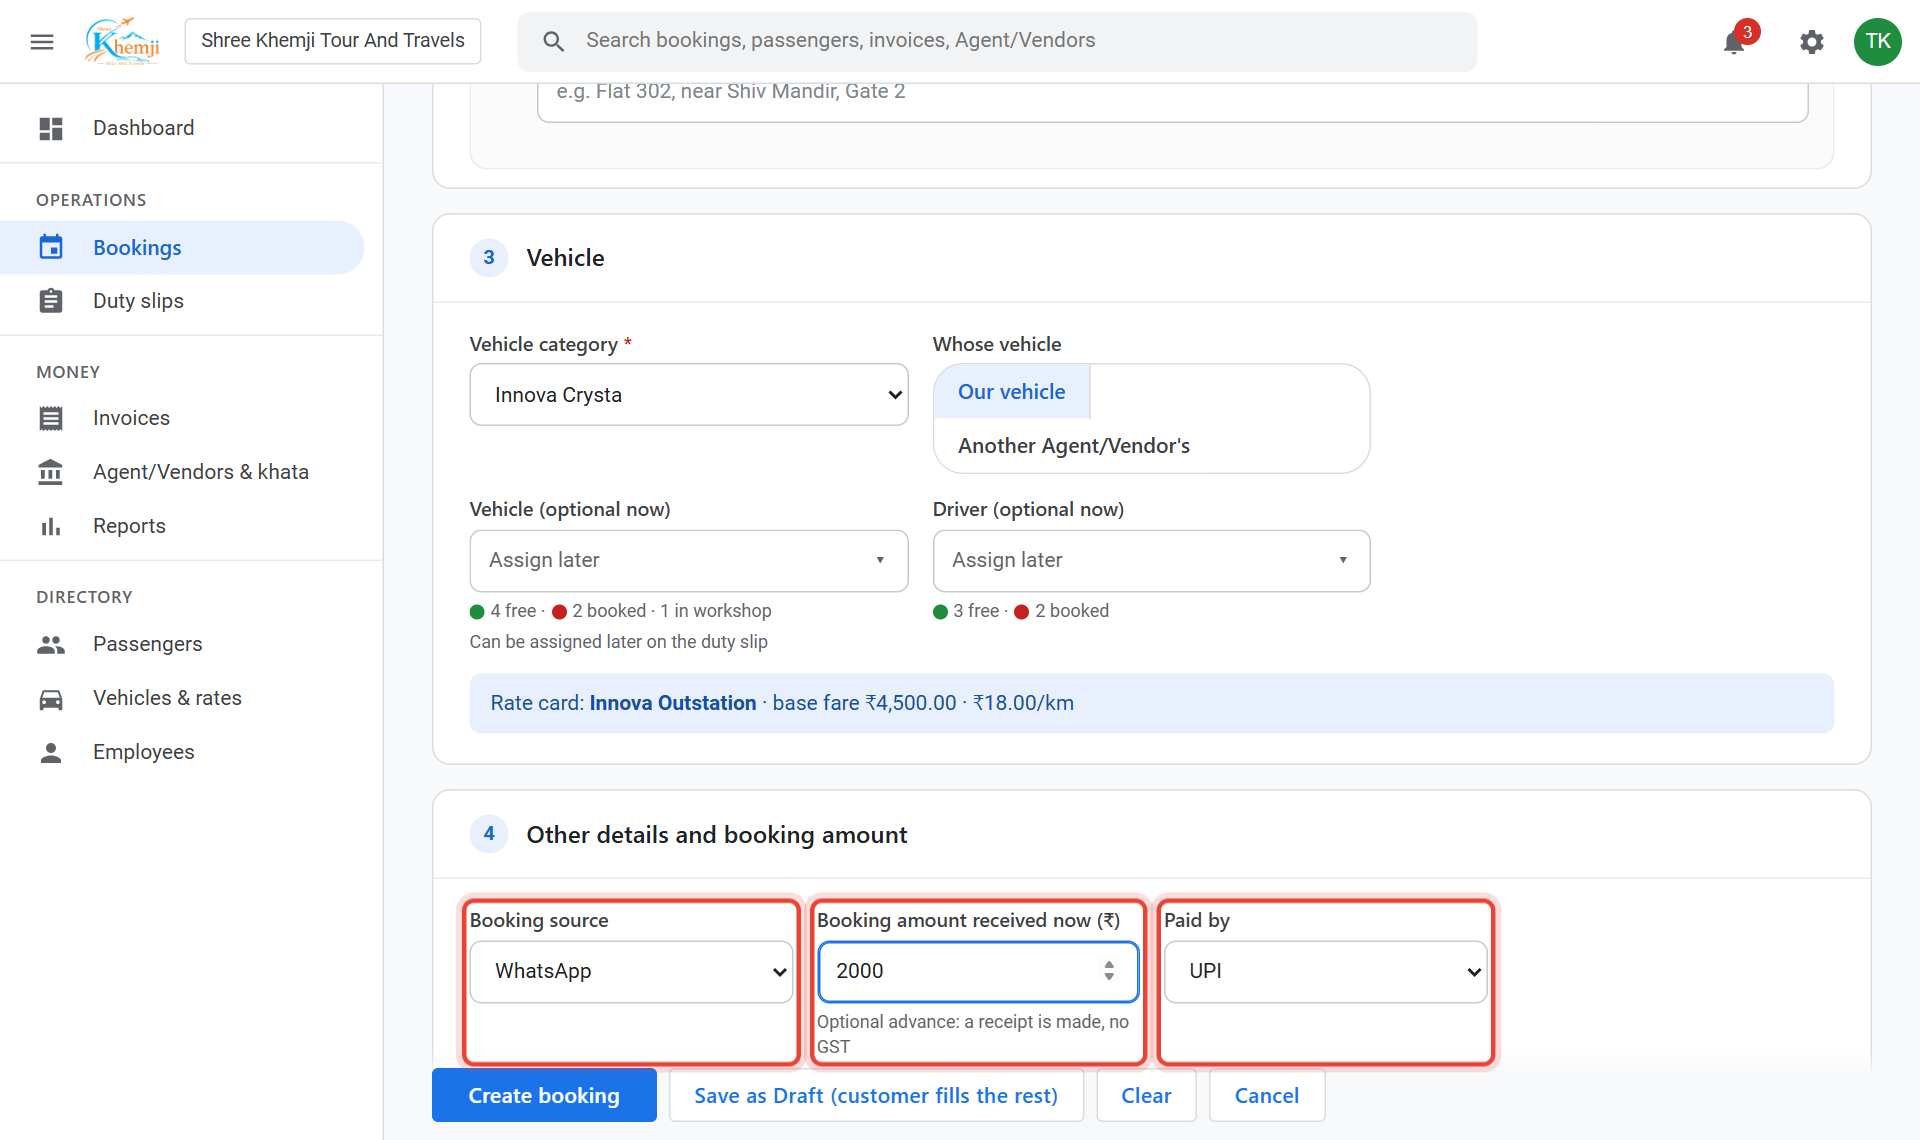
Under 3 · Vehicle, choose the car type in Vehicle category. Your rate for it shows by itself.
- 8
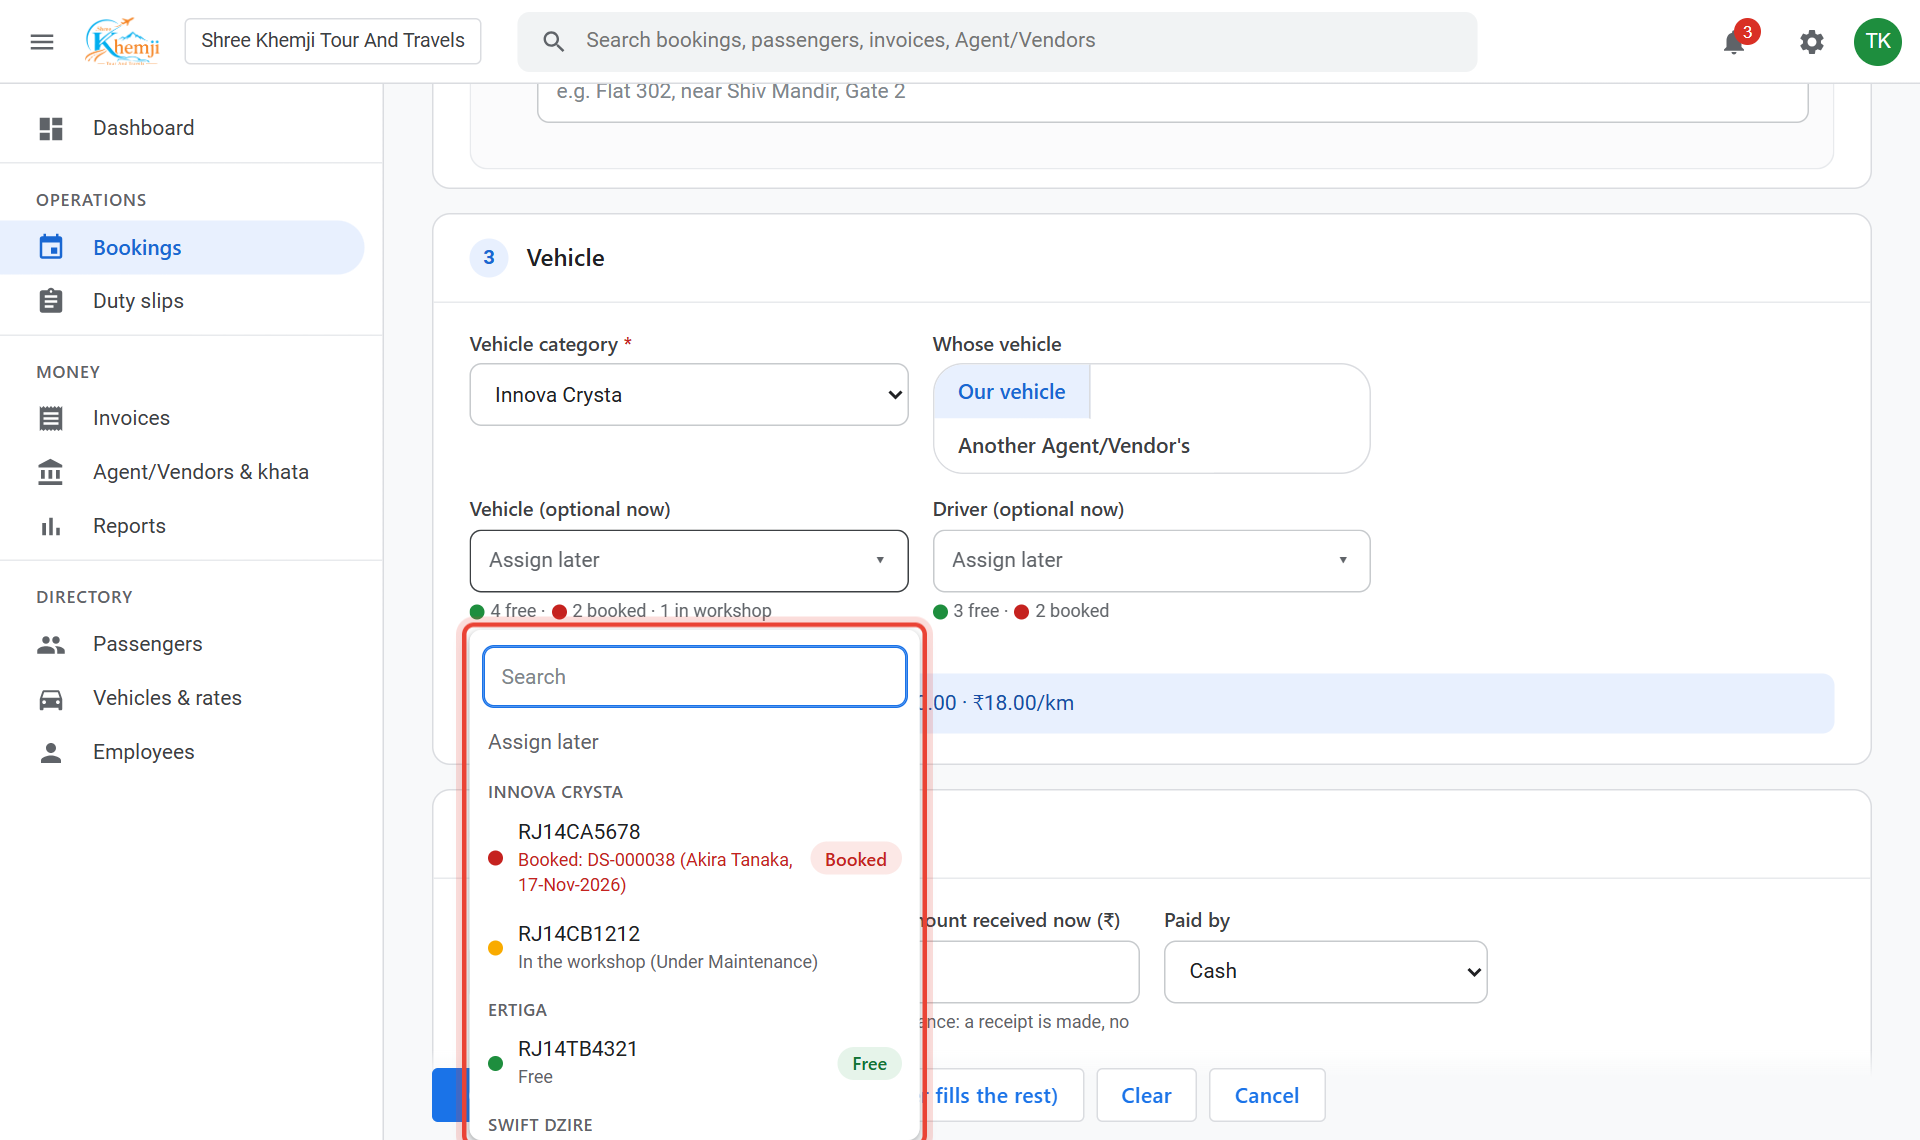
Optional: pick the Vehicle and Driver now. Free ones have a green dot, busy ones are marked Booked. Or leave Assign later and give them on the duty slip.
- 9
Under 4 · Other details: where the booking came from, and if the customer paid an advance, the Booking amount received now and Paid by. A receipt is made for it.
- 10
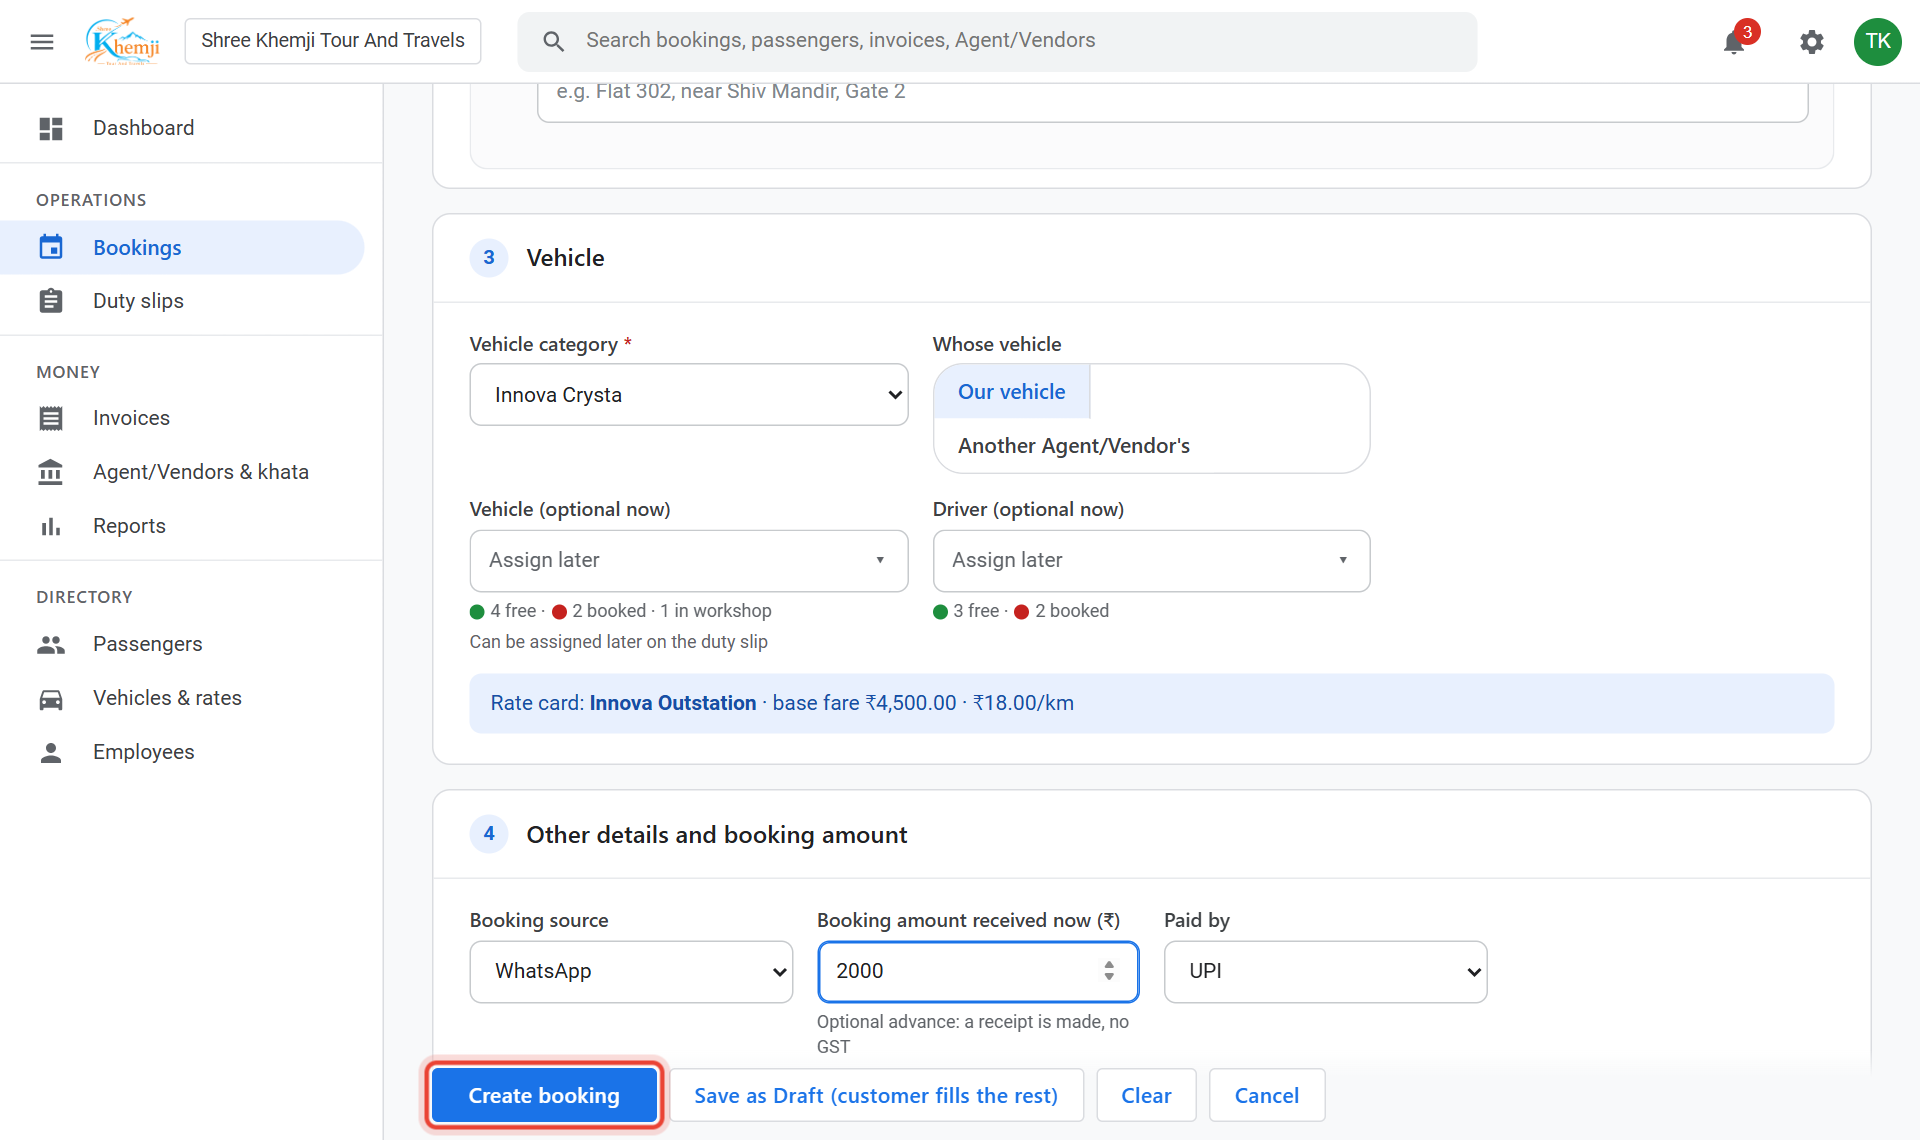
Click Create booking.
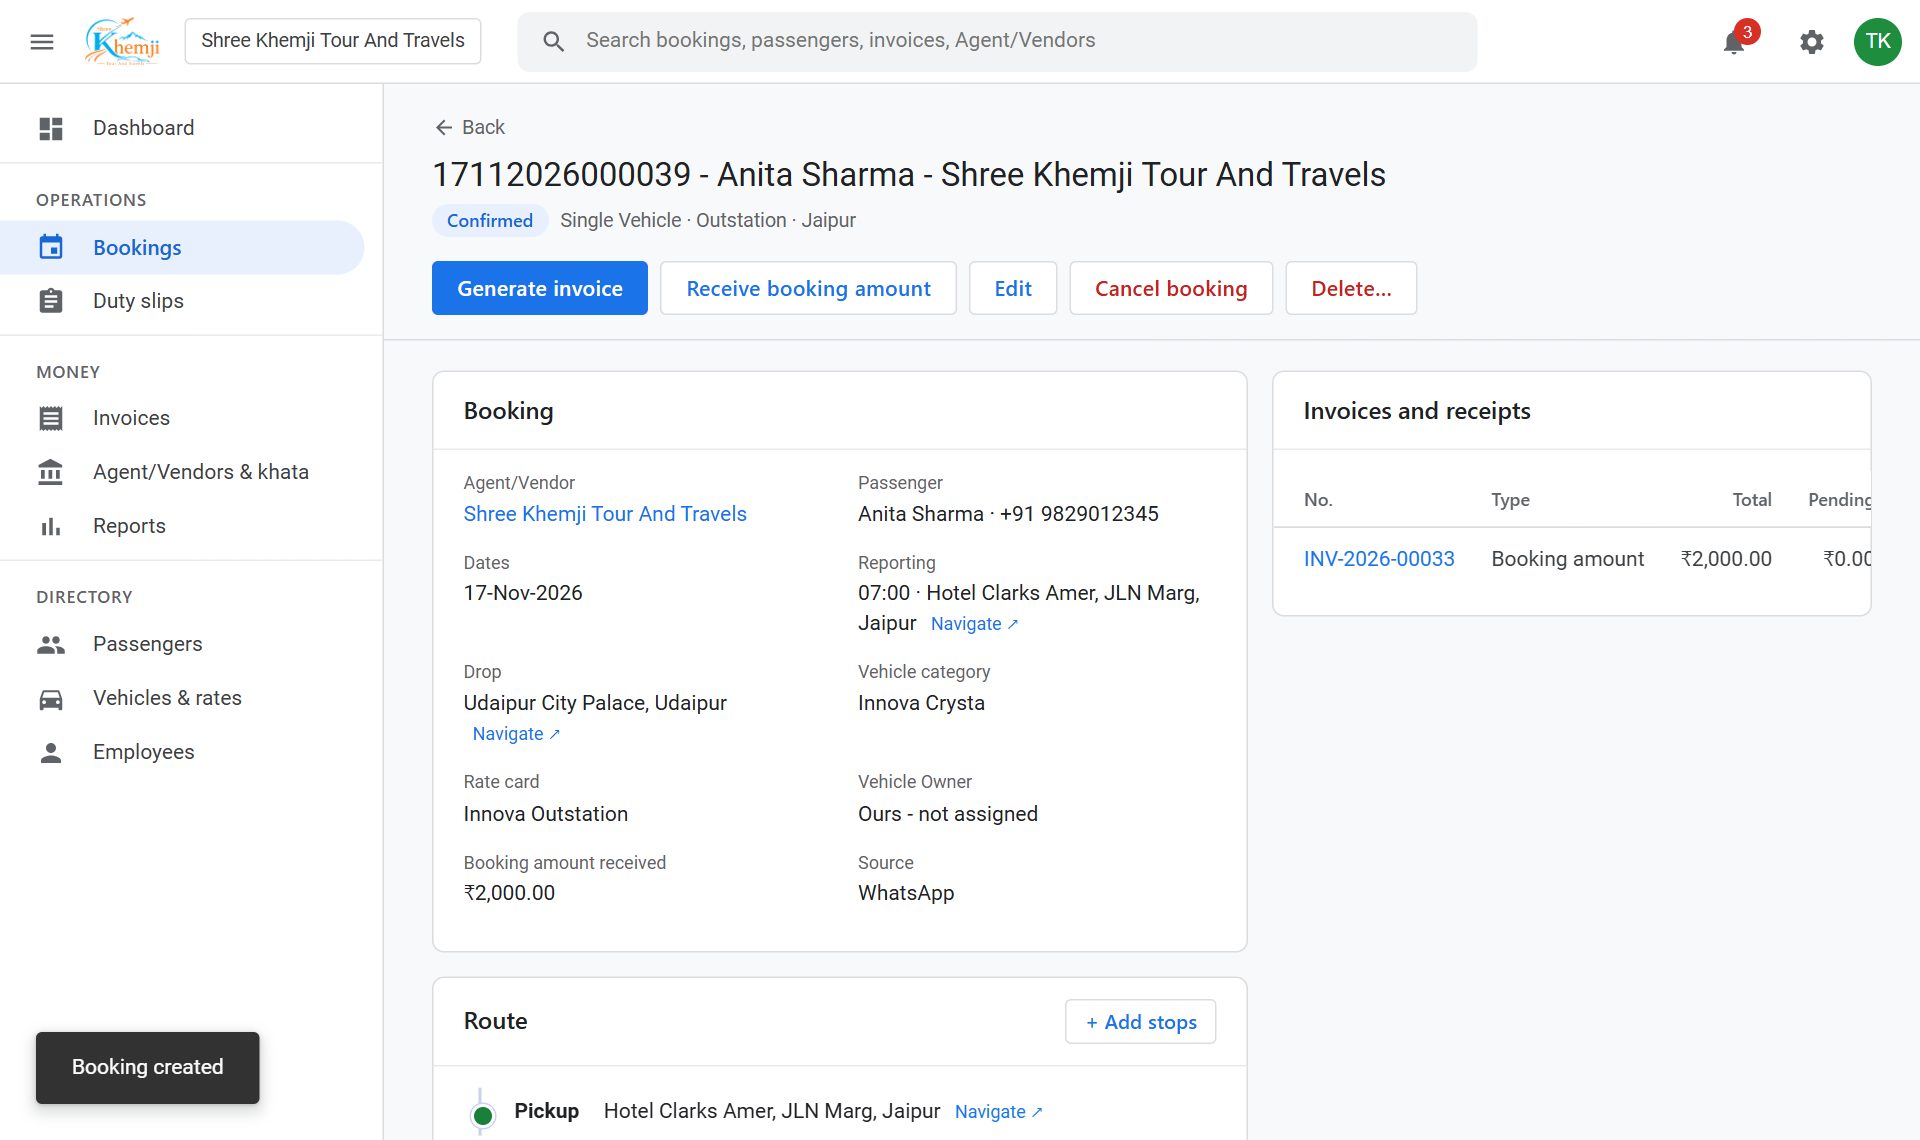
Done. The booking opens with its number, the duty slip for the car, and the advance receipt. Its status is Confirmed; it becomes Vehicle Assigned once a car and driver are given.
Something wrong in red? Nothing was saved yet: fix that box and click Create booking again.
Many cars for a wedding? In 2 · Trip click Multi vehicle (many cars) and add one row per car type with the number of cars.
Did this help?
Stuck on a step? We help on call and WhatsApp, in Hindi and English.